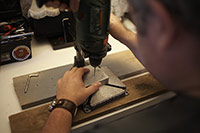
Remove the template and pilot all the holes with a 3mm drill bit

Using a stepper bit, take the holes out to their required sizes
Finishing Tutorial
making pedals look sweet
Using the theory that pictures are easier to follow than words, this is v2 of the pedal finishing tutorial with lots of pictures!
A huge thank you to Phil Greenwood Photography for taking them.
Firstly you'll need to design, print and cut out out a paper template and an adhesive decal for each pedal.
|
|
|
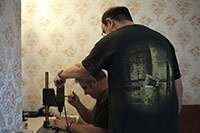
What I really need is a foot controllable pillar drill, until that's invented Mr Clegg provides remote control.
Nope, the trigger lock on our drill doesn't work ;)
Here you'll prep the enclosure in whatever way is appropriate. Sanding, polishing, etc
Now over to Mr Clegg for the Envirotex
New development: Cleggy has found that if he heats the Envirotex up baby bottle stylie prior to mixing it, he gets a much better, more glass-like finish. Basically stick the bottles in a bowl of hotish water for 5-10 mins prior to mixing.
|
|
Breathe on the Envirotex to cause the bubbles in it to burst. It's really rather cool this bit
|
|
|
New top tip!
When the Envirotex has cured, before you drill, apply some Rain-X (automotive stuff used on windscreens and motorbike visors). It fills in all the pores and no 'tex dust gets in there. It remains smooth and shiny. WIN!
|
|
Essentially at this point you're done and it's ready to drop your effect into. However if there are bubbles or flow marks in the finish, you'll need to wet sand and polish the top to remove them.
[ back ]